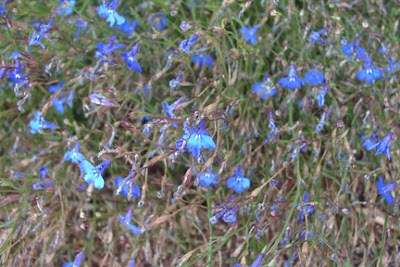
1) There are many different ways to edit your images. First be sure to duplicate your image (Ctrl/Cmd+J) so you will have an original of the image you are editing. Go to Image>Adjustments; you will access a long menu of different adjustment tools. For the purposes of this tutorial, I am going to use the Hue/Saturation adjustment tool.
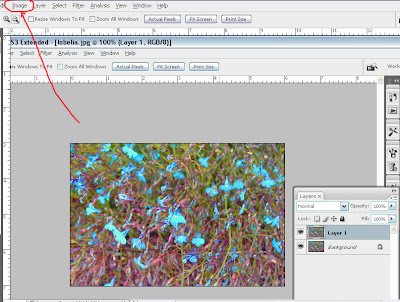 I wanted to see if I could give the flowers in the photograph a little more pop, so I set Hue at -3 and Saturation at +52 and clicked OK. But what if, after working on this image for a while, I wanted to make another adjustment to the color? If you click on the Hue/Saturation tool again, you will see that the settings have all returned to 0. Any further adjustment would be destructive to the layer you are editing. What to do? Let's start over.
Go to Windows>History> click on Open. This will take you back to the beginning. Duplicate the image again.
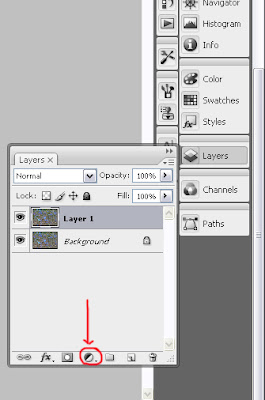 2) If your Layers Palette isn't open, do it now (Windows>Layers). The Layers Palette also contains many different tools. The button I have circled in red creates new adjustment layers. Click it now and you will see the same menu of tools you did before. The difference with adjustment layers is that you can go back and re-edit your adjustments, turn them off and on, delete them, re-create them. This gives you an amazing amount of flexibility in your work.
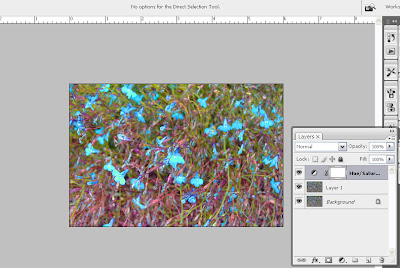 3) Once again, select Hue/Saturation and once again set Hue at -3 /Saturation at+52 and click OK. Now click on the Hue/Saturation adjustment layer again. You will see that the H/S settings are -3/+52. Change them to -8/+42 and click OK. As you continue to edit this image, you can go back and make adjustments to these settings as needed.
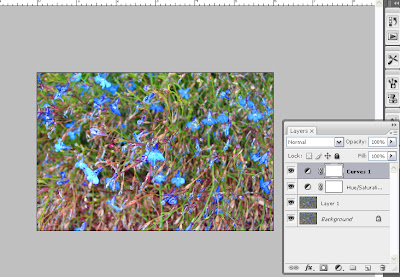
4) Click on the adjustment layer icon again and select Curves. It's OK if you have never used Curves before; for the purpose of this tutorial enter the following adjustments: output 55/input 64.
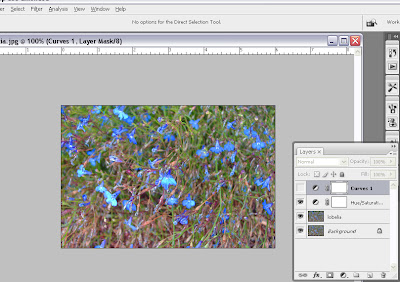 5) Now turn off the Curves adjustment layer by clicking on the eyeball column on the left. Do you like the image better with or without the Curves adjustment?
Have fun playing with adjustment layers. Try other adjustments. See how they look. Try them with different blending modes. Experiment. See what happens if you mask out part of the adjustment. Remember that my screen shots might look different from what you see on your monitor, depending on what version of Photoshop you use. The concepts remain the same.
Let me know if you enjoyed this tutorial and how it changes (if it does) the way you edit your images.
Happy Photoshopping, everyone!
© Sue O'Kieffe 2007
3 comments:
Hi Sue, great tutorial as always!! O love adjustment layers too for the reason they are non-destructive!
But I didn't know about hitting that button on the layers palette for getting a new adjustment layer - I learn something new in every tutorial you do ...
thank you!
~Diane Clancy
www.dianeclancy.com/blog
I can't wait to do this tutorial. I've wondered what an adjustment layer was and voila! here is your answer. But first things first. Today I must plant daffodils and so won't be able to do this right away :( but be assured that I will as I am very eager to find this out.
p.s. I've updated the make a mandala instructions on my blog per your input and thank you very, very much!
Love this tutorial. My old version 5.5 doesn't work exactly the same, but I was able to do the tutorial steps and what a great idea. So nice to be able to turn these layers on and off or modify afterwards. Thanks a bunch!
Post a Comment