Pages

Showing posts with label photoshop. Show all posts

Wednesday, May 13, 2009

WHO WANTS TO MAKE A MANDALA?


Are you interested in creating digital mandalas in Photoshop using your own photographs? I have created a mandala tutorial blog where I am offering personal tutoring via email to help you in the mandala making process. I am charging the unbelievably low price of $25 USD payable thru PayPal for my assistance as your instructor. I will work with you until you have finished your first mandala.

I just finished teaching my first student. We were able to sort through some good problem solving and we both came away feeling satisfied. I love to teach and I love to encourage people in their creativity and I love sharing my love of mandala making.

Because of the intense personal instruction I am offering, I do not want to work with more than three students at a time. If you are interested, let me know via email link on my side bar, and I will give you access to the blog. You must have Photoshop any version (Photoshop Elements unfortunately does not work), and a basic knowledge of working in layers and the Photoshop tool box would help. I will help you with whatever else you don't know.

Update 6/16/09: I have decided to do one class per month. Three people have expressed interest for July; please contact me if you are interested and I will add you to the waiting list or contact you if anyone changes her mind.

I have written other Photoshop tutorials that are posted on this blog. I write with the beginning user in mind. They are easy to understand. You can take a look at some of my other tuts to get a feel for my style.

I know that for some reason unknown to me, at this point in space and time, many people are being called to the mandala making process. If you have always wanted to know more about this calming, centering exercise, come join me for some mandala fun.

~Sue O'Kieffe


1.

Wednesday, March 12, 2008

HERE COMES THE SUN


Not too long ago I found this banana tree which had been pruned to make way for new growth. I found the patterns fascinating. Im all about patterns and new growth!
I am especially drawn to the hidden, the unexpected and the mysterious.

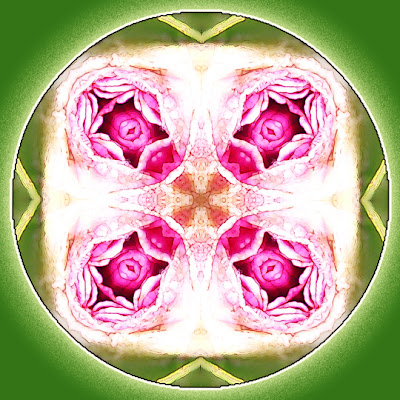
Untitled 1 - (Circles of Wonder) - © Sue O'Kieffe 2008

I used a Photoshop technique I discovered recently ( which I will share on Sunday in a tutorial) to create these images .
Untitled 2 - (Circles of Wonder) - © Sue O'Kieffe 2008

I have been mulling over this question ever since the SBDC art show a couple of weeks ago. The feedback I received in the art I showed in that exhibition has led me to believe people were more drawn to my earlier work than work that is more recent. Do you, as artists, create for yourself and hope to draw an audience towards you, or do you find what the audience wants and create for them? Or both? This is mostly directed towards those of you who are selling your art, but I'd love to hear everyone's opinion on this.

Sunday, February 17, 2008

PHOTOSHOP TUTORIAL:COPY AND PASTE SELECTIONS

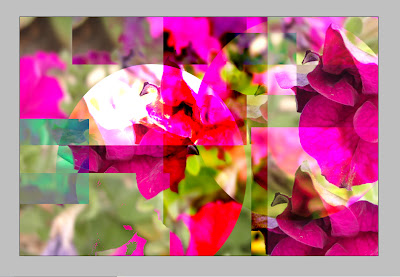
It's been a while since I've written a Photoshop tutorial, and so I thought I would start again with the simple concepts of making selections with the marquee tool, then copying and pasting those selections into new layers to create a multi-layered digital quilt. This image could then be taken in many different directions. You could refer to earlier tutorials I have written for further inspiration. (Hey, I used this process to create texture for the mandala I posted for my Valentine's Day mandala.)

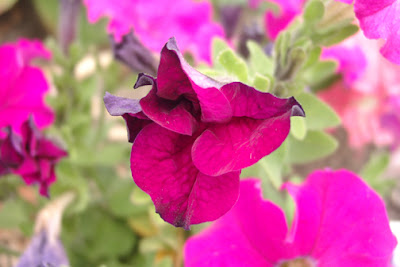
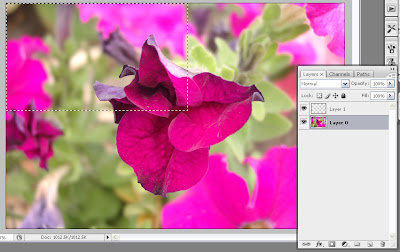
petuniaI started with this image of petunias, created a selection using the marquee tool (press M), then copied(ctrl/cmd+C) and pasted (ctrl/cmd+V) into a new layer. Everytime you paste your copied selection, it creates a new layer.
step1
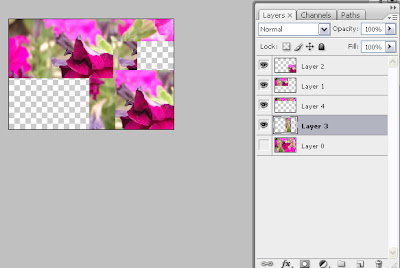
I built different layers of the quilt using different sized selections from the original background image. Don't forget to change the name of the background image to Layer 0 (double click on Background layer to change the name) or duplicate the layer (ctrl/cmd+J).

step2
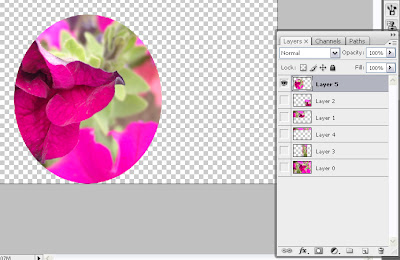
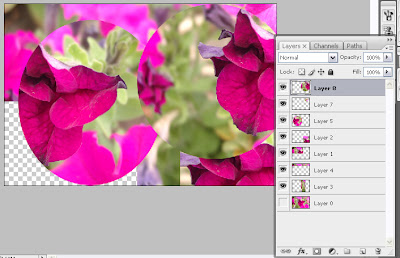
I decided to experiment with oval selections as well...
step3...and kept building layer and layer until the canvas was full
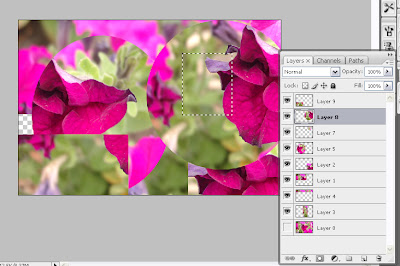
step4This last selection will go onto that blank spot on the left down there!
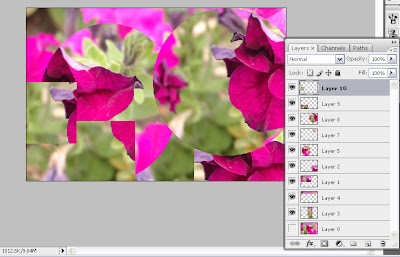
step5Now that all the blank spaces are filled in, I can begin having fun!
step6

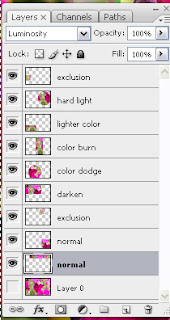
final layer palette
This is the layer palette for the final image below. As you can see I experimented with different blending modes for each layer. I like to name each layer with the name of the blending mode I used (double click on layer and rename it.) I wrote previously about blending modes here and here. I rely on this feature heavily in my art.

The final image, my digital quilt, is below. It is really just a jumping off point for whatever you might chose to do next. It is my understanding that anyone using Photoshop Elements or Photoshop Essentials has the capacity to use blending modes. The other tools and commands go back at least as far as Photoshop 5.


petuniad"Petuniad, A Digital Quilt"

Please feel free to use this final image however you want. If you do, please be sure to let me know what further alterations you made and link back to my blog. I always enjoy seeing what other people are doing.

And hey, if you enjoy my tutorials and have even learned a little something along the way, won't you consider making a donation to the cause? Tipping is not just a city in Peiking!

Happy Photoshopping!
© Sue O'Kieffe 2008


Sunday, January 13, 2008

PHOTOSHOP TUTORIAL:PATTERNS

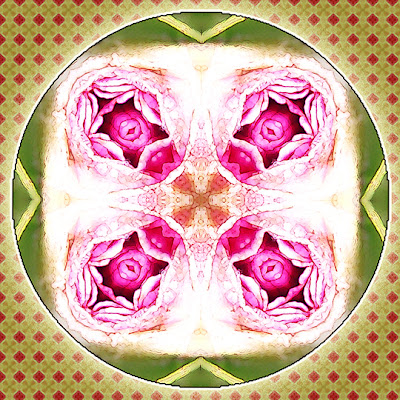
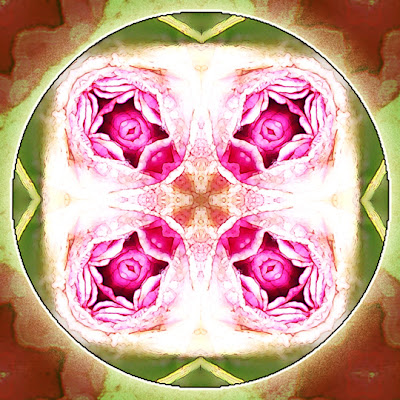
One handy dandy little function of Photoshop I enjoy playing with from time to time is creating my own patterns. It is a technique I used on the background for this mandala that I showed earlier in January as part of my Holiday Mandala series.

step 1I liked the finished image above but thought the background was kind of boring, so I wondered what a pattern isolated as a selection from the mandala would look like. I am a big fan of texture in my work, and making patterns is another way to create it. This is how:
  • Using the rectangular marquee tool, make a selection in some part of the image you want to use for your pattern. I selected the center square portion of this mandala for my pattern.
  • Go to Edit>Define pattern and click enter
  • Name the pattern
  • Double click on background layer to access Layer Styles. Click on Pattern Overlay.
step 2
  • Click on the pattern window and choose the pattern you just created.
  • Adjust scale slider until you find the size of the pattern you like. Adjust blending mode and opacity levels.

step 3For this image I moved the scale slider to 420% so that the pattern was almost obliterated. I also placed a clipping mask adjustment layer (photo filter>green) above the background layer to mute the color of the background.

I have used this technique in Photoshop versions CS-CS3. Steps may vary with earlier versions of Photoshop, but Im sure the technique is available in earlier renditions. Have fun playing with this little trick and be sure to let me know if you have any questions.

Happy Photoshopping!

© Sue O'Kieffe 2007


Sunday, January 06, 2008

HOLIDAY MANDALA 12

applied wonderApplied Wonder Mandala - (Circles of Wonder series) - © Sue O'Kieffe 2008

Today is the 12th day of Solstice. Traditionally it was a time of celebration. The Light was returning, people played games, feasted, and said farewell to the darkness. Today is also Epiphany, a Christian feast to celebrate the birth of Jesus and the shining forth of God in human form. As a feeling, epiphanies represent a sudden realization or comprehension of the essence or meaning of something. (fromWikipedia here and here).

And so I bid adieu to this season of light and greet the beginning of a new season with a new mandala series, Circles of Wonder. I have stated my intent for 2008 as one having more fun and exploration and have joined in Leah Piken's low impact challenge to Create Every Day in 2008. If you aren't familiar with her blog and inspirational encouragement, be sure to mosey over her way. This is my first posting about this year long goal. I hope to create from a place of wonder and curiosity, and have a bit of fun in the process.

I must admit that I have been feeling a little bored because I have grooved out a comfortable rut in my creating. After reading Debi Cates' enthusiasm over Photoshop's apply image command, I got to wondering and the image above is what shined forth for me. Now that I have a little understanding of this function, I will dissect it in a future Photoshop tutorial, which I hope to continue on a bi-weekly basis.

And in case you were wondering, here are the source images for the mandala.

marshmosaic


marsh mosaic merged


marsh mosaic merged


So below is the holiday series in slowslide form. I look forward to the continued sharing of our artisitic visions with each other in the year to come. May you all find delight in your many and varied personal epiphanies. Here's to wonder!


Sunday, December 23, 2007

PHOTOSHOP TUTORIAL: CLIPPING MASKS

Well, it has been a while since I've done a Photoshop tutorial. But as I promised in my post yesterday, I said I would deconstruct how to make a mandala prayer flag. I have covered most of the steps I used to create one of these flags in previous tutorials, but I have never talked about clipping masks. Don't worry; they are easy as can be!

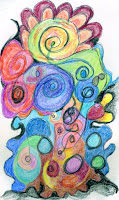
So first I drew a doodle and colored it using crayola and caran d'ache neocolor II crayons and scanned it to my hard drive.

For those of you who have followed my blog for a while, you probably know by now I use the templates on this website to create my mandalas. I feel a debt of gratitude to Komra Mokiro for her visionary approach to using Photoshop in this process.

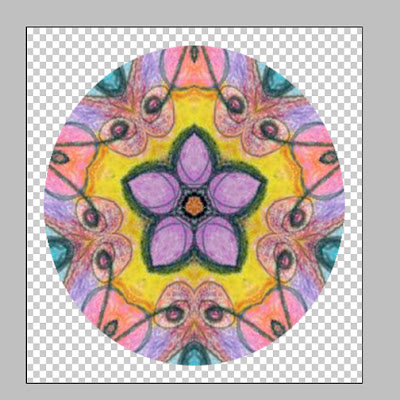
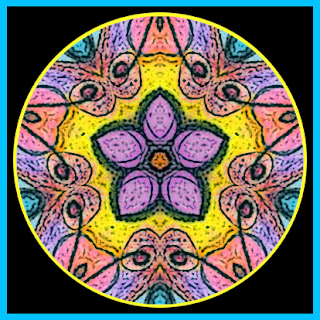
This is the basic mandala I created using the five wedge template found on the Earth Mandala website.
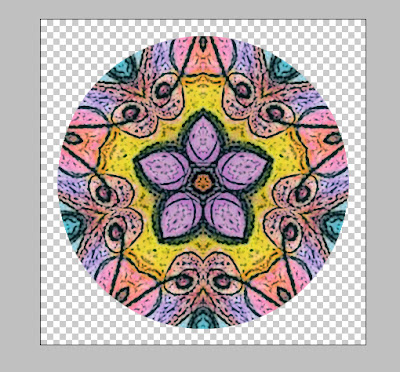
I duplicated the image (Ctrl/Cmd+J) , pressed D to set the colors to default, applied the photocopy filter (filters>sketch>photocopy), setting the detail at 2 and the darkness at 27. Then I set the blending mode to Multiply, which created the dark outlines in this image.
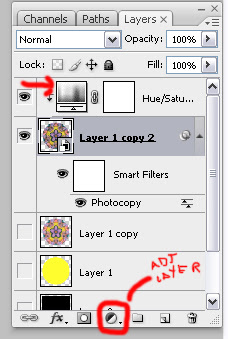
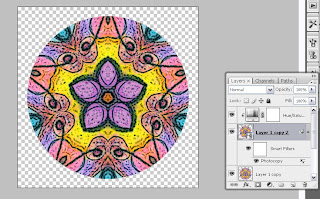
I thought the image looked a little dull, so I decided to use a Hue/Saturation adjustment layer to boost the intensity a bit. I only wanted it to affect the layer with the photocopy filter. Otherwise the adjustment layer would affect all of my layers! This is an important concept to understand when working with adjustment layers and considering their placement in your layer palette.

In order to create a clipping mask hold down the alt/option key, press the adjustment layer icon and select Hue/Saturation adjustment.

Tick the box that says:"Use Previous Layer to Create Clipping Mask" As you can see the Hue/Saturation adjustment layer is indented. This show it relates to only the layer underneath it. A regular adjustment layer affects all layers below it.

Using Hue/Saturation, set Hue at 2 and Saturaton at 26. The yellow center is most noticeably more vibrant.
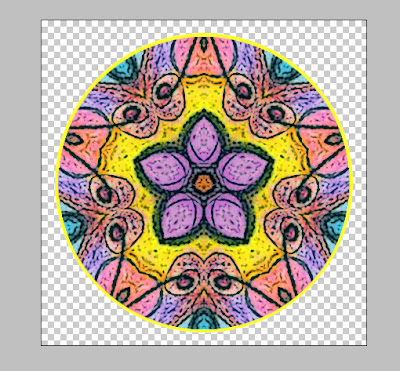
I created a new layer and chose the elliptical marquee tool. Holding down the alt/opt key and pulling upward from the center of the mandala made the selection I was creating into a perfect circle. I wanted the circle just a little larger than the circle of the mandala. Go to Edit>Fill and fill the selection with yellow.

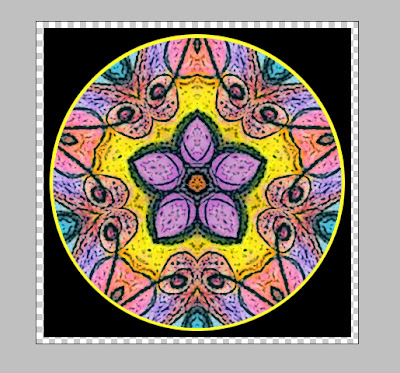
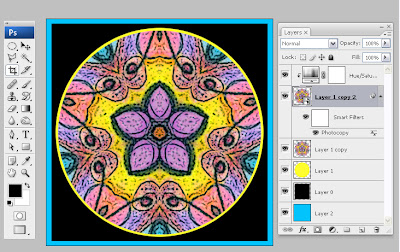
Double click on the background layer, change the name to Layer O and fill it with black (Edit/Fill). Create a new layer, and reverse the order of the layers in the layer palette, so Layer 2 is on the bottom and Layer 0 is above it. Highlight Layer 2 in your layer palette. Select Layer 2 using the crop tool (Ctrl/Cmd+C) . Hold down the alt/option key in order to expand the size of your square so it is equal on all sides.
Fill Layer 2 with a bright turquoise color.
Here is the finished image.

If you have any questions about this tutorial, be sure to let me know. I hope you all have a wonderful holiday. I will return with more Photoshop fun in 2008. Thank you all for continuing to inspire me in this journey of creation.

Happy Photoshopping!

© Sue O'Kieffe 2007


Saturday, November 03, 2007

PHOTOSHOP: HUE/SATURATION COLORIZING

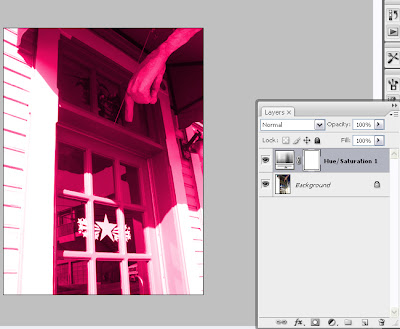
For today's tutorial I thought I would show you a simple way to convert color photographs to greyscale and then colorize them using a hue/saturation adjustment layer.


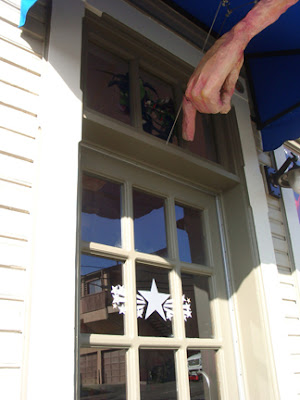
This is a photograph of the entrance to a retro used clothing store where I live.


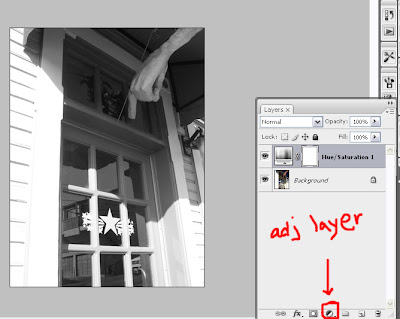
Click on the adjustment layer icon button and select hue/saturation. Drag the saturation lever all the way to the left to totally desaturate the image to grayscale. Tick Colorize window.
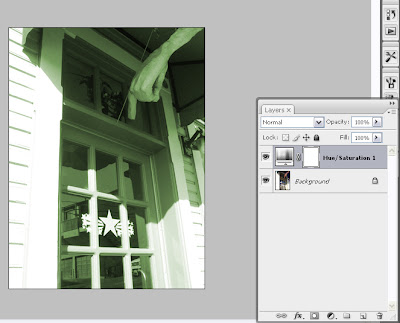
Play with hue/saturation levers until you are happy with the results. This setting is Hue 76/Saturation 24
This setting is Hue 329/Saturation 93.

Have fun playing with another way to colorize photographs. How could you integrate this technique with others I have demonstrated here? (When you figure that out, please share them with me!)

Also, in case you've never noticed my links to the right, I also have a list of resources for photoshop tutorials you might find useful. Most of them I think are geared to newer versions of PS, but you never know what you might learn.

Happy Photoshopping!

© Sue O'Kieffe 2007


Saturday, October 27, 2007

PHOTOSHOP:MORE ABOUT MASKS PART 2

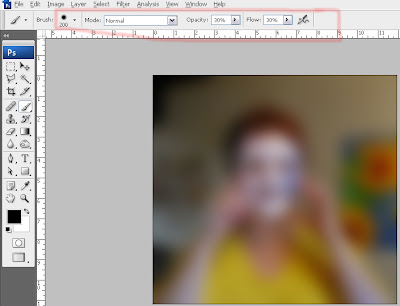
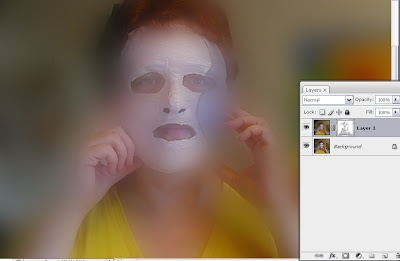
I recently learned another cool application demonstrated by Sara Francis for using layer masks. Layer masks are used to mask out details on a top layer by revealing details on the layer underneath it. Start with your beginning image and duplicate it (ctrl/cmd+J). With the duplicate layer highlighted, go to Filters>Blur>Gaussian Blur and set the sliders to around 25. You will have a very blurry layer.

In your options bar, choose a large soft brush, and set the opacity and flow levels at 30% each.
Select the layer mask icon on your layer palette and press D to set black/white to default position.
With the white layer mask window selected, I began to paint with black to reveal the image in the bottom layer. This image looked pretty good, but I thought I would try something else to play a little further.
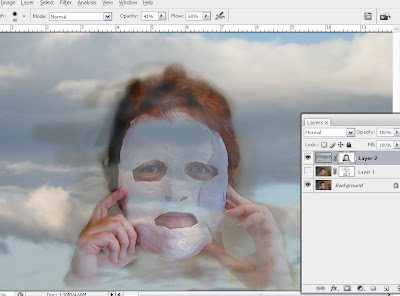
So I dragged in an image of clouds, turned off the blur layer and created another layer mask with the cloud layer.

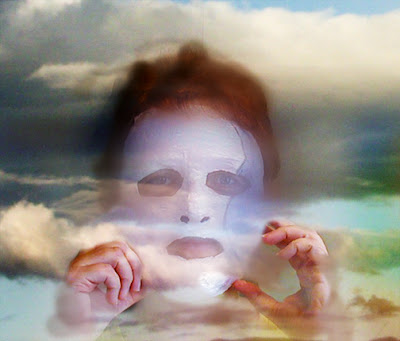
And put my head in the sky.

Turning the blur layer on and playing with blending modes took me here.It's all about having fun!


For those of you who have seen the art of Maggie Taylor, she uses this process of multiple layer masks in her digital collages. It's a skill worth nurturing.

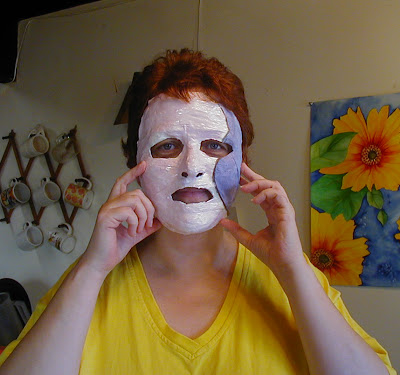
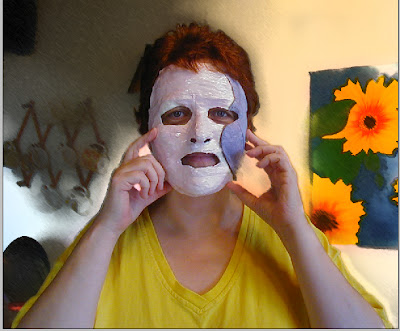
And yes! I am the masked woman.

Happy Photoshopping everyone.
Questions? Requests? Let me know.
I want to hear from you.

© Sue O'Kieffe 2007


Wednesday, October 24, 2007

PHOTOSHOP: MORE ABOUT MASKS PART 1

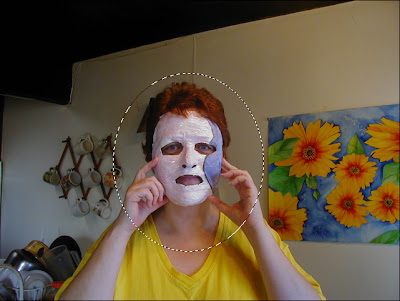
Who is this masked woman?

I have been asked to write more about masks with an explanation of when to use a quick mask and when to use a layer mask, and so I thought I would demonstrate with a series of masks using another mask that I made, in this two part tutorial

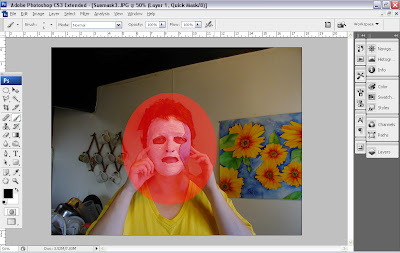
In Photoshop, Quick Masks are a way to make selections precisely. There are different ways to approach making selections, which requires a basic understanding of the selection tools in Photoshop's toolbox . For demonstration purposes, let's say I wanted to make a selection of just this woman's face.

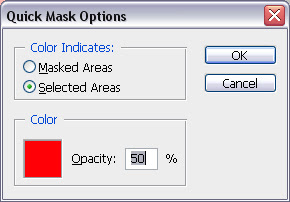
When you click on the quick mask mode icon this window comes up.
If you choose the Selected Areas button, this is the result:


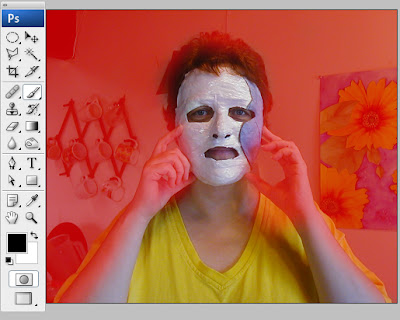
If you choose the Masked Areas button, this is what happens:
Essentially, Quick Masks are another way to make selections. The advantage of using a quick mask rather than other selection tools is they are more precise (with practice). The other advantage is that you can paint away places in your mask making that you don't want to be part of the selection. Don't get confused now. Just follow with me.

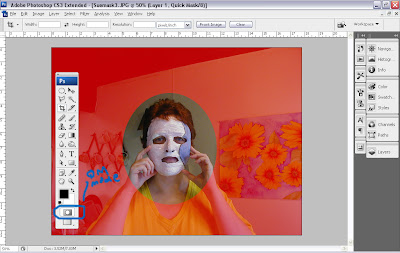
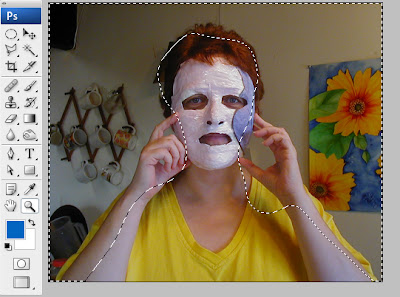
I decided I wanted to select the background in this image and leave the figure unaltered, so I went into quick mask mode (press Q or click once on the quick mask mode icon.) I painted the background with the mask color and didn't really worry about painting on the figure itself.

When I press Q again (or click on the standard mode button), I exit quick mask mode and the selection I just painted becomes visible.
  • Enter quick mask mode again
  • Press D so foreground and background colors are set to default.
  • REMINDER: Black reveals and white conceals. This is a basic Photoshop mantra. Choose a paintbrush of medium softness and paint with black and white to adjust mask as necessary. Paint black to remove red mask where you don't want it and white to add red mask where you do.
When I was happy with the mask the selection looked like this:
DID YOU KNOW YOU CAN SAVE SELECTIONS? They often take a lot of time to create, so it's always good to create a *backup*. Go to Selections>Save Selection. You can call it up anytime then, even after you close the file.

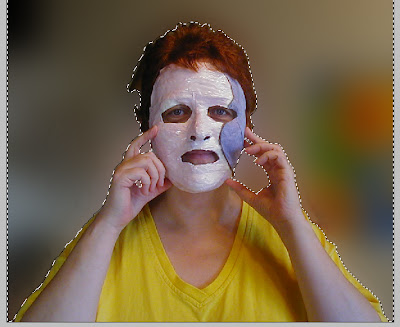
In the image above I went to Filter>Blur>Gaussian blur and set the slider to 40. Then I thought I'd try something different, so I chose Filter>Blur>Surface blur, then Filter>Artist>Smudge Stick


Sunday I will follow up with a layer mask review.

If you have questions, please let me know. I'd love to hear from you.

Happy Photoshopping!

© Sue O'Kieffe 2007