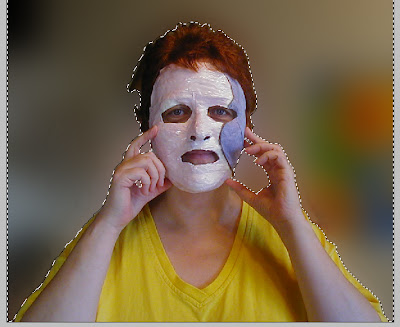
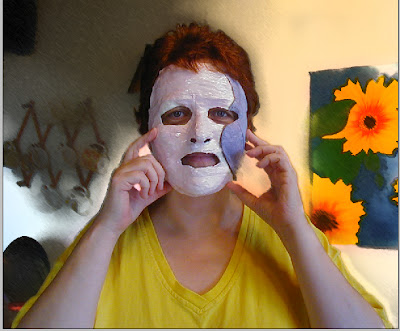
 Who is this masked woman?
I have been asked to write more about masks with an explanation of when to use a quick mask and when to use a layer mask, and so I thought I would demonstrate with a series of masks using another mask that I made, in this two part tutorial
In Photoshop, Quick Masks are a way to make selections precisely. There are different ways to approach making selections, which requires a basic understanding of the selection tools in Photoshop's toolbox . For demonstration purposes, let's say I wanted to make a selection of just this woman's face.

When you click on the quick mask mode icon this window comes up.

If you choose the Selected Areas button, this is the result:

If you choose the Masked Areas button, this is what happens:
 Essentially, Quick Masks are another way to make selections. The advantage of using a quick mask rather than other selection tools is they are more precise (with practice). The other advantage is that you can paint away places in your mask making that you don't want to be part of the selection. Don't get confused now. Just follow with me.
 I decided I wanted to select the background in this image and leave the figure unaltered, so I went into quick mask mode (press Q or click once on the quick mask mode icon.) I painted the background with the mask color and didn't really worry about painting on the figure itself.
 When I press Q again (or click on the standard mode button), I exit quick mask mode and the selection I just painted becomes visible.
- Enter quick mask mode again
- Press D so foreground and background colors are set to default.
- REMINDER: Black reveals and white conceals. This is a basic Photoshop mantra. Choose a paintbrush of medium softness and paint with black and white to adjust mask as necessary. Paint black to remove red mask where you don't want it and white to add red mask where you do.
 DID YOU KNOW YOU CAN SAVE SELECTIONS? They often take a lot of time to create, so it's always good to create a *backup*. Go to Selections>Save Selection. You can call it up anytime then, even after you close the file.
In the image above I went to Filter>Blur>Gaussian blur and set the slider to 40. Then I thought I'd try something different, so I chose Filter>Blur>Surface blur, then Filter>Artist>Smudge Stick

Sunday I will follow up with a layer mask review.
If you have questions, please let me know. I'd love to hear from you.
Happy Photoshopping!
© Sue O'Kieffe 2007
4 comments:
Yea! A tutorial and it isn't even Sunday. I love the picture you are using. Is that you in disguise? I'll be doing this tutorial this weekend, oh joy!
Thanks Sue for taking the time to post the excellent Photoshop tutorials. I've just started learning the program and it can be so overwhelming at times. Your tutorials are so helpful. Your masked woman is fabulous! -Karen
Love that masked woman! I learned a lot on this tutorial. I have been working on a collage that this will be very helpful for. Thank you once again for teaching me!
Hi Sue,
Thank you again!
I have been using the layer mask and making selections and dumping the paint bucket of either white or black (depending on which I want) to mask or unmask.
What makes the quick mask more precise? Sorry to be a pest!
~ Diane Clancy
www.dianeclancy.com/blog
Post a Comment