Pages

Showing posts with label quick mask tutorial. Show all posts

Wednesday, October 24, 2007

PHOTOSHOP: MORE ABOUT MASKS PART 1

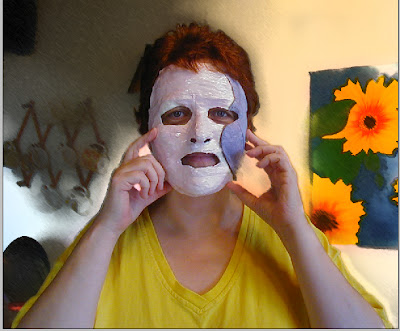
Who is this masked woman?

I have been asked to write more about masks with an explanation of when to use a quick mask and when to use a layer mask, and so I thought I would demonstrate with a series of masks using another mask that I made, in this two part tutorial

In Photoshop, Quick Masks are a way to make selections precisely. There are different ways to approach making selections, which requires a basic understanding of the selection tools in Photoshop's toolbox . For demonstration purposes, let's say I wanted to make a selection of just this woman's face.

When you click on the quick mask mode icon this window comes up.
If you choose the Selected Areas button, this is the result:


If you choose the Masked Areas button, this is what happens:
Essentially, Quick Masks are another way to make selections. The advantage of using a quick mask rather than other selection tools is they are more precise (with practice). The other advantage is that you can paint away places in your mask making that you don't want to be part of the selection. Don't get confused now. Just follow with me.

I decided I wanted to select the background in this image and leave the figure unaltered, so I went into quick mask mode (press Q or click once on the quick mask mode icon.) I painted the background with the mask color and didn't really worry about painting on the figure itself.

When I press Q again (or click on the standard mode button), I exit quick mask mode and the selection I just painted becomes visible.
  • Enter quick mask mode again
  • Press D so foreground and background colors are set to default.
  • REMINDER: Black reveals and white conceals. This is a basic Photoshop mantra. Choose a paintbrush of medium softness and paint with black and white to adjust mask as necessary. Paint black to remove red mask where you don't want it and white to add red mask where you do.
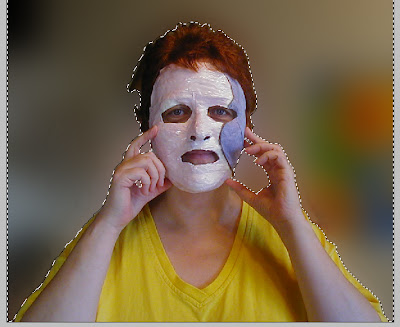
When I was happy with the mask the selection looked like this:
DID YOU KNOW YOU CAN SAVE SELECTIONS? They often take a lot of time to create, so it's always good to create a *backup*. Go to Selections>Save Selection. You can call it up anytime then, even after you close the file.

In the image above I went to Filter>Blur>Gaussian blur and set the slider to 40. Then I thought I'd try something different, so I chose Filter>Blur>Surface blur, then Filter>Artist>Smudge Stick

Sunday I will follow up with a layer mask review.

If you have questions, please let me know. I'd love to hear from you.

Happy Photoshopping!

© Sue O'Kieffe 2007


Saturday, October 06, 2007

COLORIZING PHOTOGRAPHS

When I first began to work in Photoshop, I became interested in the field of photo restoration. It's something that still interests me and I may some day go back and look at it again.

For today's tutorial I thought I would demonstrate one way to colorize photographs that builds on skills learned in other tutorials I have posted. We will also use quick mask mode and adjustment layers in this tutorial. You can review those tutorials here and here (I will be honest and tell you that I am borrowing the instructions for this from an assignment written by my photoshop instructor Jim Pegoda.)

flower girlI started with this photograph of a cute little girl (guess who?) in her flowergirl dress. In order to colorize a photograph, it must be in RGB mode. This particular photograph was already black and white, so when I scanned it to my hard drive, it was in RGB mode by default. If you want to convert a color photograph to black and white and then colorize it, this is how to do it:
  • Go to Image>Mode>Greyscale
  • Then, since your greyscale image must be in RGB mode, go to Image>Mode>RGB
With quickmask mode set to Color Indicates Selected Areas,(double click on quick mask mode button) paint black paint with a soft brush over an area that you want to colorize. Switch to Standard mode (press Q) and with your selection active, create a Hue/Saturation adjustment layer. Click the colorize checkbox and adjust the Hue/Saturation sliders as needed.
For this particular adjustment layer I set Hue at 331 and Saturation at 31.

step 1
Use this method to create a new Hue/Saturation adjustment layer for every color you want to apply to an image.
step 2
Below is a capture of the entire layer palette for the colorized image

step 3
Once the adjustment layer is created, you can adjust the opacity and/or blending mode and change the color by double clicking on the adjustment layer icon.

If you have a question about Photoshop you would like me to address, please be sure to email me or leave me a comment. I would love to hear from you.

That's it for this Sunday. Have a great week!

Sunday, September 16, 2007

THIS IS INDEED A QUICK MASK TUTORIAL

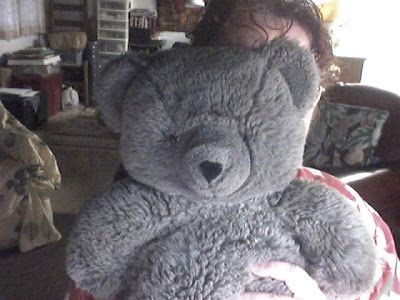
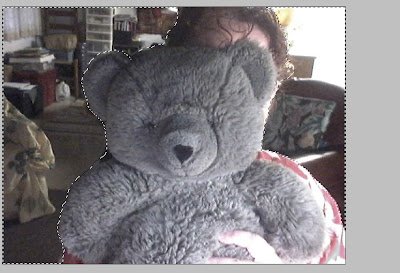
I have invited my favorite bear friend Pearl to be my model for this week's photoshop tutorial on quick masks. Isn't she wonderful?

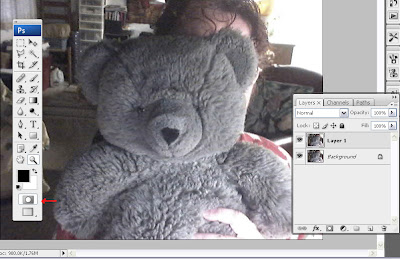
1) There are many ways to make selections in Photoshop. For purposes of this tutorial think of selection making as a way to assist in editing, altering, and changing an area in an image. In this tutorial what I have chosen as my desired end result is to blur out the somewhat distracting background. I am going to do that by choosing quick mask mode and masking out the stuff in the back in order to select it. This will become clearer as we continue, so just bear with me!2) In order to enter into quick mask mode, press Q. You can easily switch back and forth between the two modes by pressing Q back and forth. The quick mask editor button looks a little different depending on which version of Photoshop you are using. Check it out now by pressing Q and you will see the quick mask button lit up and not lit up in the tool window. I have drawn an arrow to its position on the Photoshop CS3 tool window, the version of Photoshop I am using.

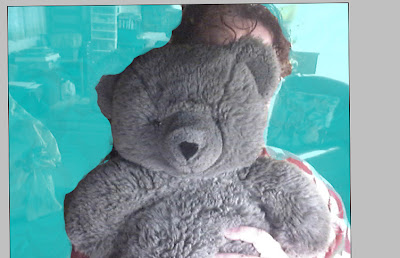
3) Double click on the quick mask mode button. You will see that the default color Photoshop uses for quick masking is red. For this demonstration I chose an aqua blue color for my quick mask because there is red in my blouse. Using blue will make it easier to see where I have painted "outside the lines."
  • Press D to set colors to default(black/white)
  • Press X if black is not the foreground color
  • Press B for the brush tool
  • Press the right ] bracket key to increase the size of your brush and the left( [ ) bracket key to decrease and paint/mask the background.


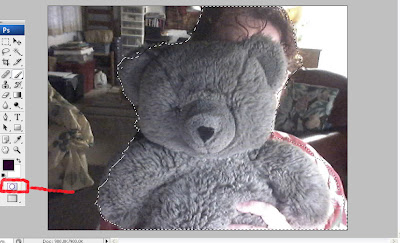
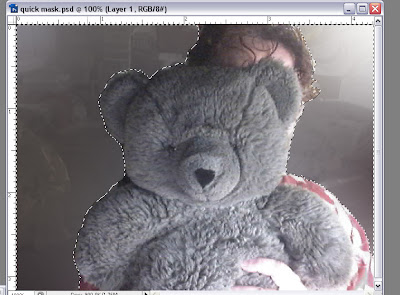
4) Press Q to exit out of quick mask mode. You will see the characteristic marching ants (moving dotted lines) that are associated with selections where you painted in the blue mask. The quick mask window is no longer highlighted either.
But what if you painted in areas you don't want masked out? Remember the Photoshop mantra -- Black conceals and white reveals --? Press X to set white to the foreground color, press Q to reenter quick mask mode, and paint out the areas you don't want masked. If you look at this image, the area along my left sleeve was painted in blue and I didn't want that masked out. I returned the image to quick mask mode by pressing Q, and painted that and other areas in white that needed to be adjusted.

So, once you have adjusted the mask to the way you want it, press Q again to exit out of the quick mask mode.

5) Remember that what I am wanting to do is blur out the background. It is that area that needs to be surrounded in marching ants. Go to Select> Inverse (Ctrl/Cmd+Shift+I) to accomplish this.


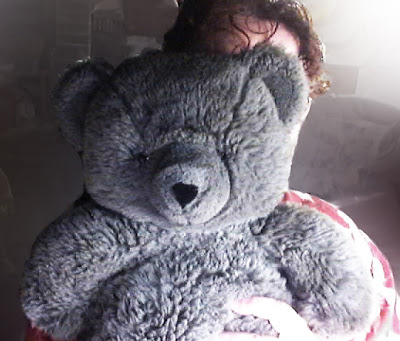
6) Go to Filters>Blur>Gaussian Blur and blur the background to the desired amount by moving the radius setting. I set this at 74.
7) Finally, delete the selection (Ctrl/Cmd+D), create a duplicate layer (Ctrl/Cmd+J), and set the blending mode for the duplicated layer to Overlay. Doesn't Pearl look ravishing now?

If you have any questions about this tutorial, leave a comment or email me at the contact address above.


Happy Photoshopping!
© Sue O'Kieffe 2007