Pages

Showing posts with label layer masks. Show all posts

Saturday, October 27, 2007

PHOTOSHOP:MORE ABOUT MASKS PART 2

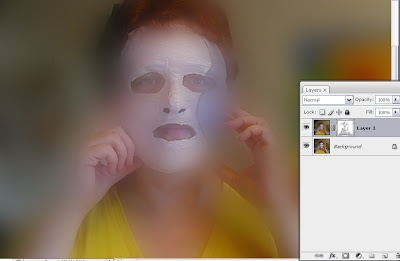
I recently learned another cool application demonstrated by Sara Francis for using layer masks. Layer masks are used to mask out details on a top layer by revealing details on the layer underneath it. Start with your beginning image and duplicate it (ctrl/cmd+J). With the duplicate layer highlighted, go to Filters>Blur>Gaussian Blur and set the sliders to around 25. You will have a very blurry layer.
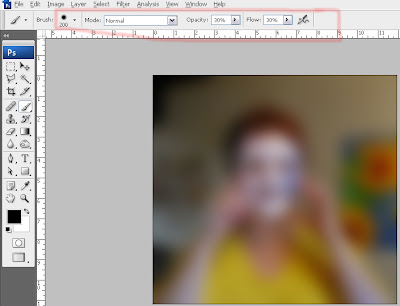
In your options bar, choose a large soft brush, and set the opacity and flow levels at 30% each.
Select the layer mask icon on your layer palette and press D to set black/white to default position.
With the white layer mask window selected, I began to paint with black to reveal the image in the bottom layer. This image looked pretty good, but I thought I would try something else to play a little further.
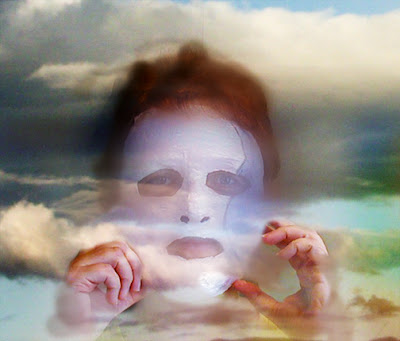
So I dragged in an image of clouds, turned off the blur layer and created another layer mask with the cloud layer.

And put my head in the sky.
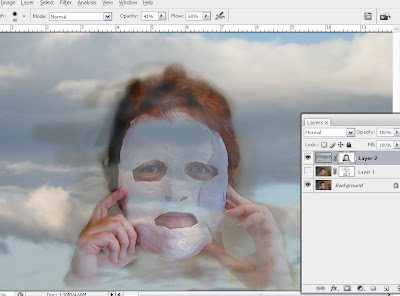
Turning the blur layer on and playing with blending modes took me here.It's all about having fun!


For those of you who have seen the art of Maggie Taylor, she uses this process of multiple layer masks in her digital collages. It's a skill worth nurturing.

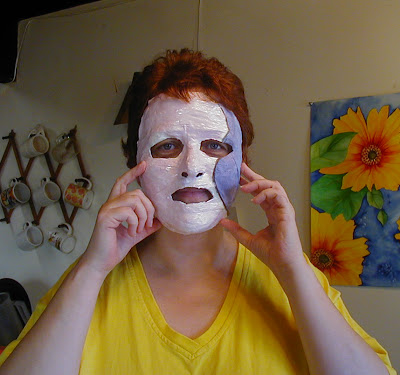
And yes! I am the masked woman.

Happy Photoshopping everyone.
Questions? Requests? Let me know.
I want to hear from you.

© Sue O'Kieffe 2007


Monday, September 10, 2007

BLENDING MODES - PART 2

I introduced the concept of layer masks in September 2nd's tutorial. In the tutorial on September 8th, I ended it using a layer mask, and that is where I am picking up for part 2 of this tutorial on blending modes.

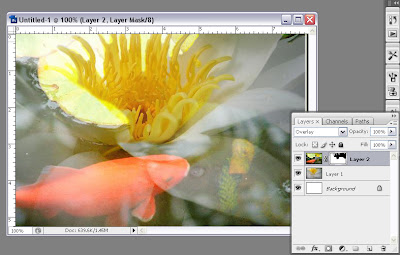
1. If you look at Sunday's tutorial, you will see that I started working with this layer mask to play with concealing some of the lily pads. I did this by setting the foreground to black (Press D then X) and painted (or masked) them out the lily pads. BLACK CONCEALS AND WHITE REVEALS, remember? The other thing about working with layer masks that is important to remember is that you are working non-destructively. You can resurrect and restore anything you are not pleased with.
step 1
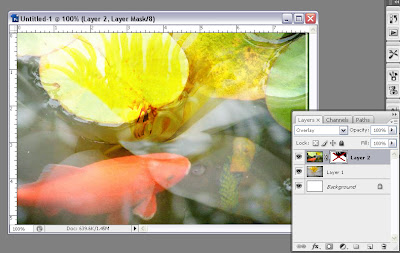
2. I wondered what it would look like if part of the lily pad showed through instead of it being masked out. Press X (which is a toggle key for setting the foreground and background colors) to make white the foreground color, then paint on the lily pad to "erase" the black of the layer mask. But really, you arent erasing as much as you are restoring. You could mask that lilypad again by painting it with black. Is this beginning to make sense now?
step 2
3. Sometimes I don't want to make a decision right away. It's easier just to turn off the mask for a while instead of masking and remasking. You do this by pressing the shift key and clicking on the mask, which is what I did here. (To turn the mask back on, do the same thing).
step 3
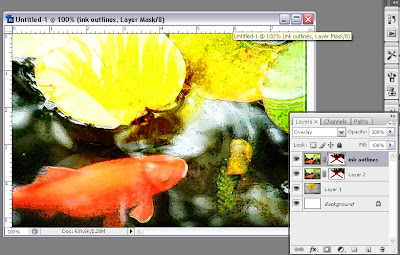
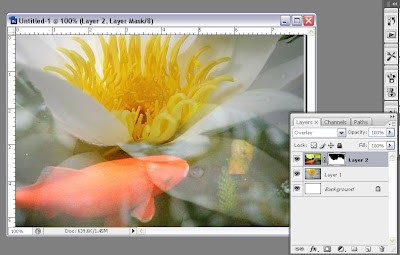
4.While I was making a decision about whether or not to reactivate the layer mask, I decided to play some more. I duplicated the layer (Ctrl/Cmd+J), then chose an artistic filter (Filter>Artistic>Brush Strokes>Ink Outlines), and set the blending mode to Overlay. Setting the blending mode to Overlay brightened the image quite a bit. Play with the blending modes to see what works for you.

I hope that you are enjoying these tutorials, that they make sense to you, and that you will be inspired to try them yourselves. Let me know by leaving a comment. If you post any of your work on your blog created after reading these tutorials, would you please reference this (or other tutorials) in your posting when you do?

Final image blending modes and layer masks - Sue O'Kieffe © 2007

Happy photoshopping.


© Sue O'Kieffe 2007

Sunday, September 02, 2007

PHOTOSHOP LAYER MASK TUTORIAL

Well, here it is Sunday again, and time for another Photoshop tutorial (insert theme music here)...

I thought I would introduce the concept of layer masks and hope it does not look too overwhelming. I am presenting it in 11 easy steps, and think if you try it for yourselves you will see it is not as daunting as it appears at first glance. Really.

One of the most important concepts to understand about making adjustments through the layer palette (as opposed to selecting Image>Adjustment) is that layer palette adjustments are non-destructive... that is, you can edit and re-edit the individual layers and still retain the original integrity of the image. In the long run, though creating layer masks may seem like a tedious process, it also gives you more room for creative play.

1. For the purpose of this tutorial, I chose two images with strong contrast in content from the website wetcanvas
2. Create a new file and move each image onto it. You may need to rename the individual image layers from Background to an editable layer by clicking on it in the layer palette and changing the name to Layer 0.


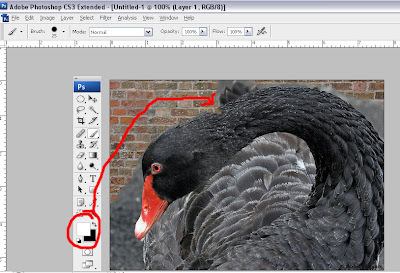
3. Stack the layers so the swan layer is above the brick wall layer.


4. Click on the swan layer to make it active. Click on the 'add layer mask' icon in the layer palette. Click on the white box to activate the layer mask. You will see a black square around the white box which indicates the layer mask is activated.

The other important thing to remember when working on a layer mask is that BLACK REVEALS AND WHITE CONCEALS.

Press D to set foreground and background colors to default settings (black foreground and white background)


5. Press B to choose the paintbrush tool. (Did you know that you can increase the size of your paintbrush by pressing the right bracket ] and decrease it by pressing the left bracket [ keys?) I like to start with a paintbrush at about 100 px. Make sure the layer mask window is active by clicking on it, and begin painting on the image with black. You will see the brick wall in the first layer begin to be revealed.


6. Looking at the layer palette, you can see that where the image is painted in black the brick wall is revealed.


7. What if you make a mistake and reveal more of the brick wall than you intended and give the swan a neck reduction? No worries!


8. Press X to set white to the foreground color (the X key is a toggle that sets the foreground/background colors back and forth) and paint to conceal the unwanted brick wall.


9. If you want to turn off the layer mask, place your mouse pointer over it, hold down the shift key and click. To turn the layer mask back on, repeat. Shift+ click is also a toggle key.


10. This is what the final masked image and layer palette looks like.


11. Ta da!

If you have any questions about this tutorial, please be sure to let me know. If any of you reading who have used this technique have anything to add, speak up please! The more the merrier. Really.

© Sue O'Kieffe 2007


Wednesday, August 29, 2007

DIGITAL PLAY PART 3

eliz3
I am departing today from my usual topics to show you the fun I had noodling around for Rima's Digital Play Challenge #3. We started with this image from wetcanvas and were instructed to have fun. How often do we hear that in our lives anymore?


end of summer End of Summer - digital photomontage
© Sue O'Kieffe 2007
Starting image + sunflower photo I took, layer mask, filters: cutout (artistic), photocopy (sketch). I will write about layer masks on Sunday for my photoshop tips

summer sunset mandala Summer Sunset Mandala
© Sue O'Kieffe 2007
Blend of two mandalas made from the starting image and the sunflower photograph, layer mask, photocopy filter on duplicate layer of bathing beauty mandala

solar print Solar Print - digital image
© Sue O'Kieffe 2007
Above mandala image using exclusion filter, placed on separate background with blue stroke on separate layer

I hope you will go see how all artists participating interpreted this challenge by visiting the gallery wall here!


Monday, August 13, 2007

SUMMER DAYS

dance with summer lightDance with Summer Light - (Circles of Light series) - © Sue O'Kieffe 2007

Shadows are lengthening and there is a chill in the air. It seems like the daffodils were just beginning to bloom, and now apple harvest is right around the corner. Two of my favorite flowers, dahlias and gladiolas are blooming in grand profusion right now. Their colors are firey and soft.

I have enjoyed the spirit of play generated by Rima's Digital Art challenges. I sent my contribution directly to Madame Curator. I want to thank Rima as well for showing us how she used Lighting Effects, which I was eager to try, and did with very subtle results in the center of this image.

In the days to come, I hope to post some short tutorials on adjustment layers and layer masks. These nondestructive methods of editing images add a new dimension of flexibility and wonderment to digital art. Stay tuned!