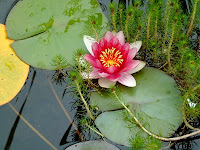
 Rima's challenge...digitally reinterpret the above image however we like .
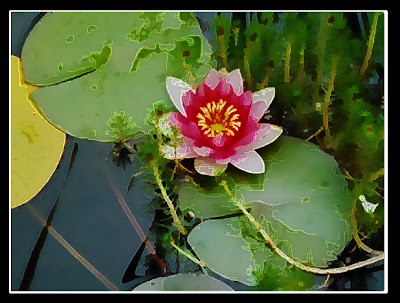
LILYPAD - © Sue O'Kieffe 2007
I used Photoshop CS3 for this challenge, but I believe everything I've done here can be done using other versions. (I don't know if V6 has smart blur, Rima. I really started using PS at the CS version stage.) I knew I wanted to do two different pieces with this image, one altering the original photograph and another creating a mandala from the alteration. Lilypads always echo back to Monet for me, so I knew I wanted to create a watercolor effect. I also knew I didn't want to spend a lot of time playing with this image but enough to make for a hopefully interesting mandala. I borrowed heavily from a watercolor technique I have used before. The instructions for the technique can be found below in my steps. The only thing I did differently when creating the pen and ink layer was not invert it. So my process for this image went something like this:
- I thought the original image was a little dull, so I created a duplicate layer, set the blending mode to overlay and then merged the two layers together to create a new background image.
- Created watercolor/pen and ink image following this tutorial. Do not invert pen and ink layer. Set opacity at 32%
- Created third layer. Set foreground color to black. Use photocopy filter detail 7/darkness8. Click OK. Moved layer to top of layer stack.Set blending mode to multiply and opacity at 27%.
- At this point I thought the image was too dark, so I created a curves adjustment layer at the top of all the layers to lighten it.
- On the original background layer, I used the crop tool to actually increase the size of the image. This is a handy trick to know. Run the crop tool around the image, In order the increase the size of your canvas equally on all sides, hold down alt/option key, and pull out adjustment to desired amount of increase. Hit Enter key. Fill background layer with black.
- Created a new transparent layer above the black layer. Use rectangular selection tool and outline image of lilypad. Go to Edit>Stroke. Create white stroke 5 pts. Ctrl/cmd+D to delete selection outlines.
- Voila! (Hey and I think I am even remembering Mac counter part keys. Am I good or what?)

Lilypad Mandala - © Sue O'Kieffe 2007
The tutorial for making mandalas can be found at this website.
- After I created the mandala, I duplicated the layer three times. (Not necessarily in this order), first I sampled the fuschia color in the image and chose Filter>Sketch>Photocopy detail 4/darkness 7. Click OK. Set blending mode to multiply and opacity to 100%
- Second layer Filter>Artistic>Paint Daubs>Brush type Wide Sharp>Brush size 8/Sharpness 7. Click OK. Set blending mode to Normal 100%
- Third layer set blending mode to Overlay. Opacity 100%. Move third layer above second layer.
- I wanted more focus on the center of the mandala, so I used the circular selection tool. Held down alt/option key and dragged selection tool up from center to just select the center portion of the mandala. Created new layer underneath top layer, copied and pasted selection into new layer. Return foreground color to black default. Select photocopy filter using black. Set blending mode to multiply. Move this selection to top of layer stack.
- Sampled grey in mandala image for background color. Filled background layer with grey.
- Clicked on second layer image to reveal Layer Styles. Double clicked on outer glow. Clicked on color box. Sampled dark magenta in mandala. Set blending mode to Normal in Layer Style dialogue box. Adjusted glow to desired amount. Clicked OK.
- Double clicked on stroke. Sampled grey from background and created stroke 3 px/23% opacity.
- Decided I was finished. Sometimes ya just gotta.
(The big challenge here really was writing down all the steps. And forgive me please the ongoing shift in verb tense. Not gonna make it perfect)
EDIT: A third image can be viewed at my other blog here
7 comments:
So interesting the different ways each of us interpreted the same image. Love it!
You are a certified master! I am in awe of your vision and dexterity!
Bobbie...thanks for stopping by.
Neda...hey, don't sell yourself short here. We just have practice in different media. im an artist/geek
Wow - you aren't kidding about being techie!! What great detail for what you did! I sure wouldn't know to do all that!!
Great results too! I went to the other site to see the third one but couldn't find it. But I did click the slide thing on bottom left under pictures and I went to a page - I think slide.com ????
I thought that slide show was outstanding - and I rated it - so you can see which one I mean.
You had asked for feedback about animation stuff - I think this kind of slide show could enhance your site - that is my initial feedback.
And you have motivated me to go look at the mandala site. And that watercolor is so watery!!
Great job!
~ Diane Clancy
www.dianeclancy.com/blog
Wow! someone scrape my jaw off the floor! Whoaaa! I think the rest of us mere mortals will need a few hundred light years to get to do what you soooooo effortlessly do... You're the Fred Astaire of digital art, with all the elegance, mastery and flawless charm of this timeless virtuoso.
Oh, wow....
Now, how do you ever find the time to do these TWO blogs plus all the rest! You truly amaze me
Oh, and also thanks for the excellent tip on the creativepro tutorial - it's very good
Me again! I promise not to do this again - but Neda made a point on her blog about how both your blogs appear under the same name in your profile - this is why most of us are not visiting the other one (which is equally interesting) as often as this one.
I really like the mandala you settled on for the profile image.
Post a Comment