For today's tutorial I thought I would demonstrate one way to colorize photographs that builds on skills learned in other tutorials I have posted. We will also use quick mask mode and adjustment layers in this tutorial. You can review those tutorials here and here (I will be honest and tell you that I am borrowing the instructions for this from an assignment written by my photoshop instructor Jim Pegoda.)
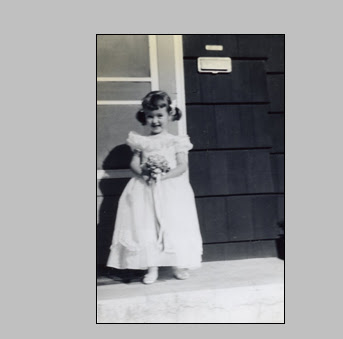
 I started with this photograph of a cute little girl (guess who?) in her flowergirl dress. In order to colorize a photograph, it must be in RGB mode. This particular photograph was already black and white, so when I scanned it to my hard drive, it was in RGB mode by default. If you want to convert a color photograph to black and white and then colorize it, this is how to do it:
- Go to Image>Mode>Greyscale
- Then, since your greyscale image must be in RGB mode, go to Image>Mode>RGB
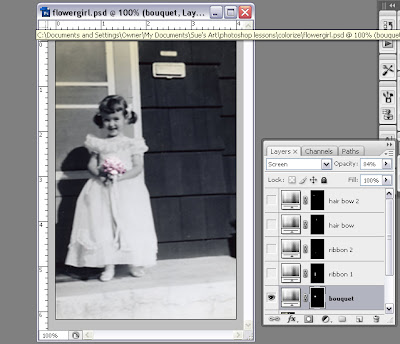
For this particular adjustment layer I set Hue at 331 and Saturation at 31.

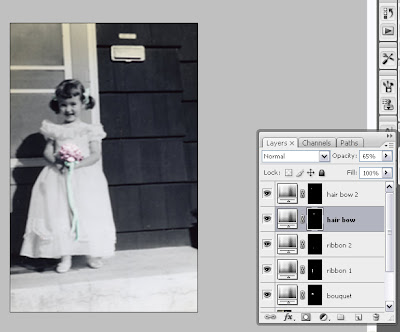
Use this method to create a new Hue/Saturation adjustment layer for every color you want to apply to an image.

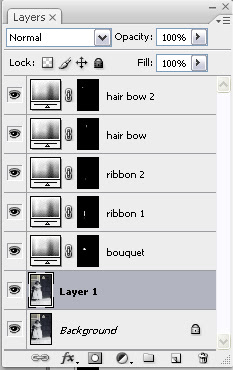
Below is a capture of the entire layer palette for the colorized image

Once the adjustment layer is created, you can adjust the opacity and/or blending mode and change the color by double clicking on the adjustment layer icon.
If you have a question about Photoshop you would like me to address, please be sure to email me or leave me a comment. I would love to hear from you.
That's it for this Sunday. Have a great week!
9 comments:
Yea! I know what I'll be doing this weekend. I always look forward to your tutorials and always learn a lot. You'd be proud of me how far I have come since starting your tutorials. Thank you, again!
Thanks Bobbie.I saw a need and decided to try to fill it. It does me good to see you grow!
Great tutorial! I'm glad you've created a section on your blog for it. I hope you are circulating it well.
I love the flowergirl picture, adorable!!!
Sounds a lot more reliable than the method I've been using. Thanks, looking forward to trying it.
I love these adjustment layers, so you can turn them on and off at will. The little girl is darling :)
p.s. Thank you again for doing these tutorials. They help me so much and I have grown a lot since I started them, plus they are very easy to follow.
Yes, I think she is a sweet little girl, too. hehehe
YOU are adorable in that picture!!! I love it..and still keeping all your instructions on file!
Hi Sue, trying to catch up here ... thank you for doing this .. I got lost a little.
This is where I got lost "With quickmask mode set to Color Indicates Selected Areas,(double click of quick mask mode icon) paint black paint with a soft brush over an area that you want to colorize."
I don't see where to set the quick mask modes ... I think we are getting to the root of my masking problem.
Other than that - very easy to follow ... I just got lost!!
thank you!
~ Diane Clancy
www.dianeclancy.com/blog
Post a Comment